Sunday, March 25, 2007

Preventing Attic Moisture

Today we installed our studor vent and further weatherstripped/insulated the attic hatch. It's a nice feeling accomplishing these small tasks. The problem at hand was the fact that the vent pipe from the upstairs bathroom plumbing opens in the attic, when it should go outside. Rather than cut a hole in the (slate) roof, we found a much cheaper solution: the studor vent. It allows fresh air into the pipe, so that the drains can drain properly, but prevents any errant sewer gases from getting up into the attic.

Of course, no good project gets finished without an extra trip to the hardware store. We discovered that the vent we bought, though adjustable for both 1.5 & 2 inch pipes, did not in fact fit the 2 inch pipe currently in the attic. So Jake made a run to Ace. Although we only needed about two inches of pipe, it only came in 5-foot lengths. Here's how Jake got it home:


We used PVC primer & cement to "weld" the pipes together.


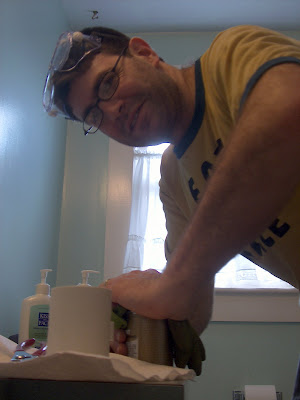
The hardest part of the job was getting the cans opened! Check out Jake using his brute strength.


And here it is, the glorious studor vent, installed:


While Jake took care of the plumbing, I worked on weatherstripping the edge around the hatch, and putting new insulation (w/ a vapor barrier) on the hatch itself.


It felt good to get these things finished. While I was cleaing up in the basement, I took a bit of time to look more closely at our paint can collection, left by the previous owners. Checking out the labels yielded some interesting results:


Here's a timeline for some of the painting done in the house:

04/16/1998: Dining Room painted pale yellow

07/02/1998: PINK Room painted, well, PINK

07/30/04: basement wall painted bright orange

????at some point, they bought a $5 gallon of "oops" paint in a green color that I suspect is what's in the bathroom. Funny.

The information above comes as a bit of a surprise. We had previously made some surprising findings regarding the PINK color that seemed to be all over the house. It would seem that the previous owners (they bought the place in 1998) immediately painted OVER the PINK in the dining room, but then shortly thereafter, painted the (brownish) wallpaper in the pink room PINK. Strange.

Anyway, that's all for now. Happy Spring to all our faithful readers.

Wednesday, March 21, 2007

The Insulation Itch

Sometimes, I get the itch to do something around 83 Durant. Today, after a long day of sitting at my desk and in meetings, I just wanted to do something more substantial than make up lesson plans and quizzes. It was 6 pm. Is this really a good time to START a home project? Generally, no. But, as Jake wasn't here to talk me out of it, I decided:

Why not insulate?

Indeed, why not?

Many times, these sorts of evening/nighttime projects that I begin do not end well. I'm pleased to tell you now, that this one was a success!

As you may recall from previous posts, the basement laundry room/bathroom is clearly mid-project. [That would be a project started by the previous owners.] Framing has been built for insulation and drywall, but some of the bays are empty. I decided to work on the two full-sized empty bays, as portrayed here:


As you will also remember from a hilarious previous post, we have plenty of insulation to fill these bays. To my disappointment, Jake was correct in his calculations, and I indeed was incorrect: there are five pieces, each 93 inches long, in the package. And they E-X-P-A-N-D when you open the plastic.


Lucky for me, these pieces are each exactly the length I need for the height of the wall, so all I needed to do was shove them up into the space between the studs. I also carefully carved out spaces for the pipes in the area (compacted insulation doesn't do its insulating job).


I used my handy staple gun to staple the Kraft paper to the stud, and voila! It's insulated! It didn't take long at all.


For future reference, I include the photo below to show the location of pipes. We're hoping to move the washing machine (and hence, water & drain pipes) over to this area sometime in the not-too-distant-future.


And here we are, with the two bays complete! I'm so pleased! There are still the two corners to deal with, as well as a few other spots down here, but for now, this seemed like a good night's work. In the (hopefully) near future, we'll finish up the remaining bays, and then we need to cover up this Kraft facing. It's not really supposed to be exposed like this (some kind of fire hazard). Drywall is the fancy way to go, but I'm not sure we need or want to do that. At the very least, we need to staple up some plastic sheeting to cover this up and contain any stray fiberglass particles.


While in the basement, I also took on one of those longstanding WHHHHHAAAAAAAT? issues: the red sweatshirt stuffed into the hole in the chimney. I removed the shirt, shoved some nice fresh insulation inside, and then covered it with a brand new flue stop from the hardware store. It's basically a metal plate with prongs on the back to hold it in place. I sealed the whole (hole) thing up with caulk, and here it is!!!


R.I.P. Old Red Sweatshirt:


And by the way, safety first when dealing with insulation. I wore long sleeves & pants & gloves, all of which went into the wash immediately after I finished. A face/nose mask and goggles, too -- that stuff is nasty! By the way, I got some how-to tips on this project from a book I borrowed from the library: Time Life Books: Insulating and Weatherproofing. It was the updated, spiral-bound edition, and it is a great resource.

The whole deal took me about an hour and a half; still plenty of time afterwards to clean up and blog it all before Jake gets home from class. The question is, will Jake notice the new insulation? I suppose the real question is, will I be able to contain my slightly giddy pride in my accomplishment long enough to let him notice it?

Monday, March 19, 2007

One Victory, One Defeat


Regular readers will recall my recent post asking for help with a basement lighting fixture. Shannon's brother Johnny gave us a ton of information and suggestions, but in the end, we relied on Jake's Dad, John, and went with the quick and easy fix. Since the light was (luckily!) in the "on" position, I bought and screwed in another pull-string fixture right into the socket. Voila! A new light for separating darks from lights in the landry room!
A nice, easy fix, woo hoo!

And then, the agony of defeat: the basement window off the driveway continues to plague me. Today I bought an off-the-shelf window well cover. Unfortunately, our window well is unique (like everything at 83 Durant) and the cover doesn't completely cover the well.


And of course, the window well cover would only solve the problem of water falling from above; it still doesn't solve the problem of the water leaking in from the driveway. Sigh. So it's back to the previous temporary solution. This involves a liner of plastic sheeting attatched to the window and concrete with duct tape, then filled part way with spray foam, and then surrounded with bricks. On top of this mess I've put a piece of plastic that the previous owners left. Unfortunately, during the snow this past weekend, Carter stood on top of the plastic, leaving it in its current state:


It's not ideal, but it does seem to be keeping some of the water out, which is better than than leaving it completely open to a waterfall.

Thanks to all our helpful readers for their expertise and advice!

Flat Roof Update

Today I had a helpful guy from Scott Roofing Services come check out our flat roof on the back and our little roof over the front door. The problems:

--> The tiny roof over the front door has wooden gutters with no place for the water to go, so the water/ice is bursting through the wooden moulding, causing some damage. We're not sure how to fix this, although someone has suggested we put a rubber roof over the whole thing, gutters and all

--> The flat roof on the back shows some leakage around the edges -- basically, the fascia boards underneath it (around the back porch) are rotting in sereral places. These rotted spots provide prime entry points for, oh, say, a flying squirrel or two. Or four.

--> There's a spot in the dining room (below the flat roof) where there was clearly once a leak. While it is no longer active, we don't know how much or what kind of repair job was done on it.

--> As per our infrared pictures, the point where the flat roof joins the rest of the house has an air leak -- it needs to be insulated and sealed to prevent things like frozen pipes in the upstairs bathroom.

Of course, there's too much snow around to get a good look at everything, but he did have some good news: the main problem with the flat roof on the back is probably only with the metal flashing around the edge. This should be much less expensive than a whole new roof. He'll have to come back after the snow melts, but for now, we're pleased to be on top of this project.

In other news, 83 Durant has set a new record: we had 40 people in the house on St. Patrick's Day. It was great. The avalanche of food was matched only by the avalanche of snow that fell from our slate roof -- amazing!

Wednesday, March 14, 2007

More Infrared Images

In reponse to popular request, and because I just think these images are really cool, I'm including a few more images from our Infrared photo report. You should be able to click on the images to see bigger, full-page versions.

This first one is from our bedroom, and it does a nice job of showing the contrast between an insulated and an uninsulated area of the wall:

This is the outside wall in the upstairs bathroom. Said bathroom does not have a radiator in it (though it does have that mysterious hole in the floor). It also has a non-functioning electric heating element under the sink cabinet. We have hooked up a small electric radiator in this room, but the corner pictured here is rather far away from that heater.


Perhaps the most serious problem that the photos uncovered is the place where the one-story flat roof on the back of the house meets the side wall of the back of the house. The pictures below are from the pink room. The very cold spots on the ceiling and at the top of the wall are at the spot where the flat roof meets the exterior wall. There's also an uninsulated bay in there between the room and a closet.


So it seems that the flashing where the flat roof meets the house has some gaps, or is uninsulated. Interestingly, the bathroom that was the victim of frozen pipes earlier this season is DIRECTLY ABOVE this area of the house. This would seem to explain the freezing.

We also have another cry for help to our readers. We thank all of you who made suggestions to our previous issue (the basement window well). Here's a photo:


This is in the ceiling in the basement laundry room. I know, I know, it's a light socket. That much is clear to me. The problem is, as you may be able to see, the pull-chain that is supposed to turn it on and off is completely missing. It would be very handy to have this bulb operational, to provide more light in the laundry room. Any suggestions on what to do about this?

Monday, March 12, 2007

Basement Window: Back to the Drawing Board


When the guy at the hardware store laughs at you, it's not really a good sign that you're on the right track to solving your home problem.

Faithful readers will recall our leaky basement window beside the driveway. I made a temporary fix by lining the window well with heavy duty plastic, which I weighted down at the edges with wet towels. This seems to have kept water outside the basement, but collected a rather large pool of water in the well itself.

My plan: continue with the plastic lining method, but fill the liner with something so that it wouldn't fill with water. My thought was that that super-expanding foam stuff would be ideal; it would make a form that exactly fits with the well, and as long as I put down the plastic liner, it's not permanent. And if it didn't work, I was out a can of spray foam. So, guess, what? Looks like I'm out a can of spray foam. You'll see my process here: first the lining of the well:


And here's the foam:


OK, So I have to let it cure for an hour, but there is no way this stuff is gonna fill the well. I'll update with more photos, but I'm pretty sure this won't work. That said, dear readers, I welcome your suggestions. We could use your help! What can we do for a quick, simple fix for this?

[Incidentally, the long-term fix for this is to build up the sides of this well with bricks so that it's higher than the driveway, then cover the whole well with a plastic thing. This will keep both falling rain and driveway drainage from running into the well. But the masonry is going to have to wait until summer. So we're looking for something temporary and quick to get us through the spring rain/thaw.]

Sunday, March 11, 2007

Small Fix-it Projects: Door & Floor

Meet Mr. Carter, Dog Contractor


Carter was an enormous help on our job today. The bottom of the front door has some heavy duty interlocking metal weatherstripping on it. Unfortunately, it was bent (before we moved in) and made a horrible screeching sound when we opened the door. It also pulled some of the wood apart at the bottom of the door. We've wanted to fix it for a while, but it seemed unwise to take the door off on some of the bitterly cold days we've had lately.

Today, with lovely 50-degree temperatures, we were ready to go. After taking the door off its hinges (a surprisingly simple job!, we removed the nasty broken and bent metal piece.


After rehanging the door, we were sad to find a rather large gap between the threshold and the bottom of the door. Thankfully, we had bought a metal/rubber door sweep last fall, and it was just the right size. So we put that on for added protection. It seems to do the job. Carter was an excellent supervisor, ensuring that everything was done to code.


Front door mission accomplished, I moved upstairs to tackle the hole in the bathroom floor.


With the proper tools (and a cool bag to carry them), the job is much easier.

Saturday, March 10, 2007

Spring Break at 83 Durant (woo hoo!)

We started Spring Break off right on Friday by going to the RESTORE in Springfield. It is our new favorite place. You can check out details at their site, but basically, they carefully deconstruct houses or rooms that are about to be demolished, and save anything that's worth saving. Radiators, bathtubs, cabinets, woodfloors, moulding, everything and anything you can imagine. They also take donations from contractors, or anyone, and sometimes it's even new stuff. For instance, if someone purchased five times the insulation they needed to complete a job, they could donate some to the ReStore. There was a ton of tile and lighting fixtures, and a crazy number of doors and windows of various shapes and sizes. It's an amazing place. They they sell everything for A LOT less than you could find it anywhere else. It's basically a home-repair thrift store.

We got a new utility sink for $20; it will replace the busted utility sink currently in our basement. We also got a lot of exciting ideas for future projects, so we'll be going back again once we have some plans, measurements, and time. It's a great place.

In the upcoming week, we're hoping to take care of a few things:

--Storm door for pink room door
--Studor vent in the attic
--cork floor hole in bathroom
--further insulate/weatherstrip attic hatch
--close flue hole in basement chimney
--work on leaky basement window

MAYBE we will take on some other things (depending on time)
--insulation in empty bays in basement

Today we also received the results of our thermal imaging of the house, which we had done on Monday. We found out a lot about the insulation in the house, and most of it was good news. Someone did insulate most of the walls (probably with blown-in cellulose). There are spots that were missed, and some spots where things have settled, but mostly, we're in pretty good shape. Here's a page from the report. the top part shows the door to the outside from the pink room; the bottom one shows the door to the outside from the kitchen. It's clear that we need some storm doors!


I'll add some more details and images later. We're thrilled with the very informative report, provided by Proscan Infrared Thermography.

Tuesday, March 6, 2007

New Toys


Auntie Paula brought Carter a couple of new dog toys; he is quite smitten with his toy pheasant. There's a bird dog for you.


Jake is the proud new owner of a Brompton folding bike. It's pretty rad (I'm sure he'll elaborate here).

JB here: The Brompton is indeed pretty rad. It takes me about 30 seconds to fold or unfold it, though I expect to get faster with practice. I've just started working two days a week for a bike company, doing some database programming. It's 25-30 miles away, which is a tad too long for bike commuting (at least in the winter). But with the Brompton I can ride two miles to the train station, fold the bike, take the train south to West Medford, unfold the bike, and ride six miles to work.

And here's me unfolding the bike (also my first appearance on YouTube):


If you want to get sucked down a YouTube® vortex, here's a beginning: Somebody made an Brompton with an electric motor for a front hub -- amazing!


And then some kid from Zimbabwe doing donuts on a bike. Why? I don't know, but I like it.

Monday, March 5, 2007

History Day for 83 Durant!


I did some historical sleuthing today and found a Lowell Atlas from 1896. In the middle of the image you see above, you should see a box belonging to JOS CHASE. That's 83 Durant! Unfortunately, the earlier atlas (1879) is less clear in labeling numbers; we're not sure if our house is there or not. But I'm hoping to do some more sleuthing in person a the historical library collection sometime soon.

[This comes after Jake and I served as judges this past weekend for Massachusetts History Day.]

Slate Roof


The very nice guys from Twelfth Century Slate Roofing arrived today to make some repairs for us. It's a bit noisy here at 83 Durant. They are working on the chimney first, fixing up the counter-flashing (that goes around the flashing that the mason already installed). They're also replacing some missing and broken slates, as well as putting on a lovely new copper ridge. It's an exciting day!

Here are some after shots:


We learned that our downspout & gutter guy messed up. The gutters are too high for a slate roof, and the downspouts were put on backwards (which is why the water runs down the OUTSIDE of the gutters). This is annoying. But they said the chimney looked good. They also gave some advice on the flat roof on the back and the small overhang over the front door. We're going to get some estimates for rubber roofing for those areas, but it's not a huge rush.

That's all for now!

Saturday, March 3, 2007

MacGyvering Madness at 83 Durant

Yesterday, in an attempt to stem the tide of water entering through the basement window by the driveway, I put a heavy-duty trash bag into the big open well area that normally lets water seep into the window. [Normally, such a window well should be several feet deep and filled with drainage rock at the bottom; ours is about four inches deep, and solid concrete. No wonder the window leaks. We need more of a submarine porthole.]


My trash bag and towel solution worked beyond my wildest dreams, and seems to have kept a LOT of water out of the basement, which is always a good thing. But it created a rather amazing trough of water outside. You can kinda get the gist of it here:

We figured having a pond of water there wasn't such a good idea, so we went about a bailing out program, helped by our trusty SHOP VAC. We heart our shop vac!

The drainage pipe in the middle of the driveway has frozen up (not surprisingly) so all the melting snow water is just sitting there. We devised a plan to clear out and then defrost the ice plug. Here's shop-vac in action:


After sucking all the water out, we tried adding a couple of kettles of hot water, to no avail. Jake tried using a metal fence post to assault the ice plug, but it was also sadly unsuccessful, unless you want to call breaking off a part of the pipe successful. We then tried using a little electric water heater -- the kind you use to heat up a mug of tea. It too was unsuccessful, although admittedly, we didn't try for too long, as we started to get nervous about all the extension cords and potential fire/electrical hazards we were creating.

We'll hope things warm up enough tomorrow to get some movement. For now, all is well.

Friday, March 2, 2007

On Calculations and Basement Hydration


Our insulation arrived today, via the friendly Man in Brown. I was rather shocked to see how very large the four boxes were. I did in fact order four packages of insulation, but somehow, I thought they were going to be...uh...smaller.

Here are the specs I read on the website, and which you also see above on the packaging:
Sq.Ft. 48.96
6-1/2 Thick
Wdth. x Lgth. Ins. 15 x 94
Includes 5 pieces

So I thought each package contained 5 pieces which, together, were 94 inches long. Since we had four empty bays in need of insulation, each 93 inches tall, I ordered four packages. It seemed perfect.

(You can see for yourself if this is a reasonable mistake to have made by looking at the site where I bought it here. Perhaps mistake number one was having no idea how much insulation should cost per foot. I dunno, it seemed reasonable.)

It was brought to my attention by my mathematician husband that in fact, the packaging meant that there were 5 pieces, EACH being 94 inches long. So we now have FIVE TIMES the insulation required for this job.

I feel kinda dumb.

On the bright side, we do have plans to tear out the plaster in the spare bedroom, which would be the ideal opportunity to add more / put in new insulation there, and these batts will be perfect for it.

Also, I like that they're KRAFT-FACED BATTS. I wonder if the Kraft food people are the same people responsible for the Kraft paper on the insulation. I wonder if Kraft cheese provides any insulating benefits. Many readers are already aware of my previous encounters with bats, so the fact that I would welcome this many batts, kraft-faced or not, is rather surprising.

_____

While I was telling my mom the above story, she happened to ask if we had any water in the basement (the presence or absence of water inside our house is a regular discussion point for us). I realized I hadn't checked the situation with the problematic basement window by the driveway lately. We've just had a ton of rain on top of snow and sleet, so it seemed wise to investigate. There were, predictably, some very wet towels inside that window. No surprises; fixing that is a spring plan, and the towels were doing just what they should. You can see the state of things here:


The surprise was water on the floor in several previously dry places. None of the water was by walls, so it seems that the water was seeping up through the floor, through various patched cracks in the cement. Oh dear.


It's not an enormous amount of water, but still, I don't like that it's there. Water is our enemy. [A colleague in my department told us that, in a frightening, dead-serious way.]

We're not on red-alert, but we do need to keep an eye on this new development. Sigh.